Saturday, May 31, 2014

Hole in the Basket Solution


My new passion: Fair Trade Arts.  Fair Trade items are crafted by women in many countries as a way to increase their income, so they can provide food and education for themselves and their children.  These cottage industries are making a difference in the health and well being of thousands of women and children around the world.

I have known about such items for a long time, but their importance was made very clear to me after I read Half The Sky: Turning Oppression into Opportunity for Women Worldwide by Kristof and WuDunn.  So my plan is to buy something, some jewelry, or other item, whenever I can, to support my global sisters. That can only help make the world a better place for all human beings.

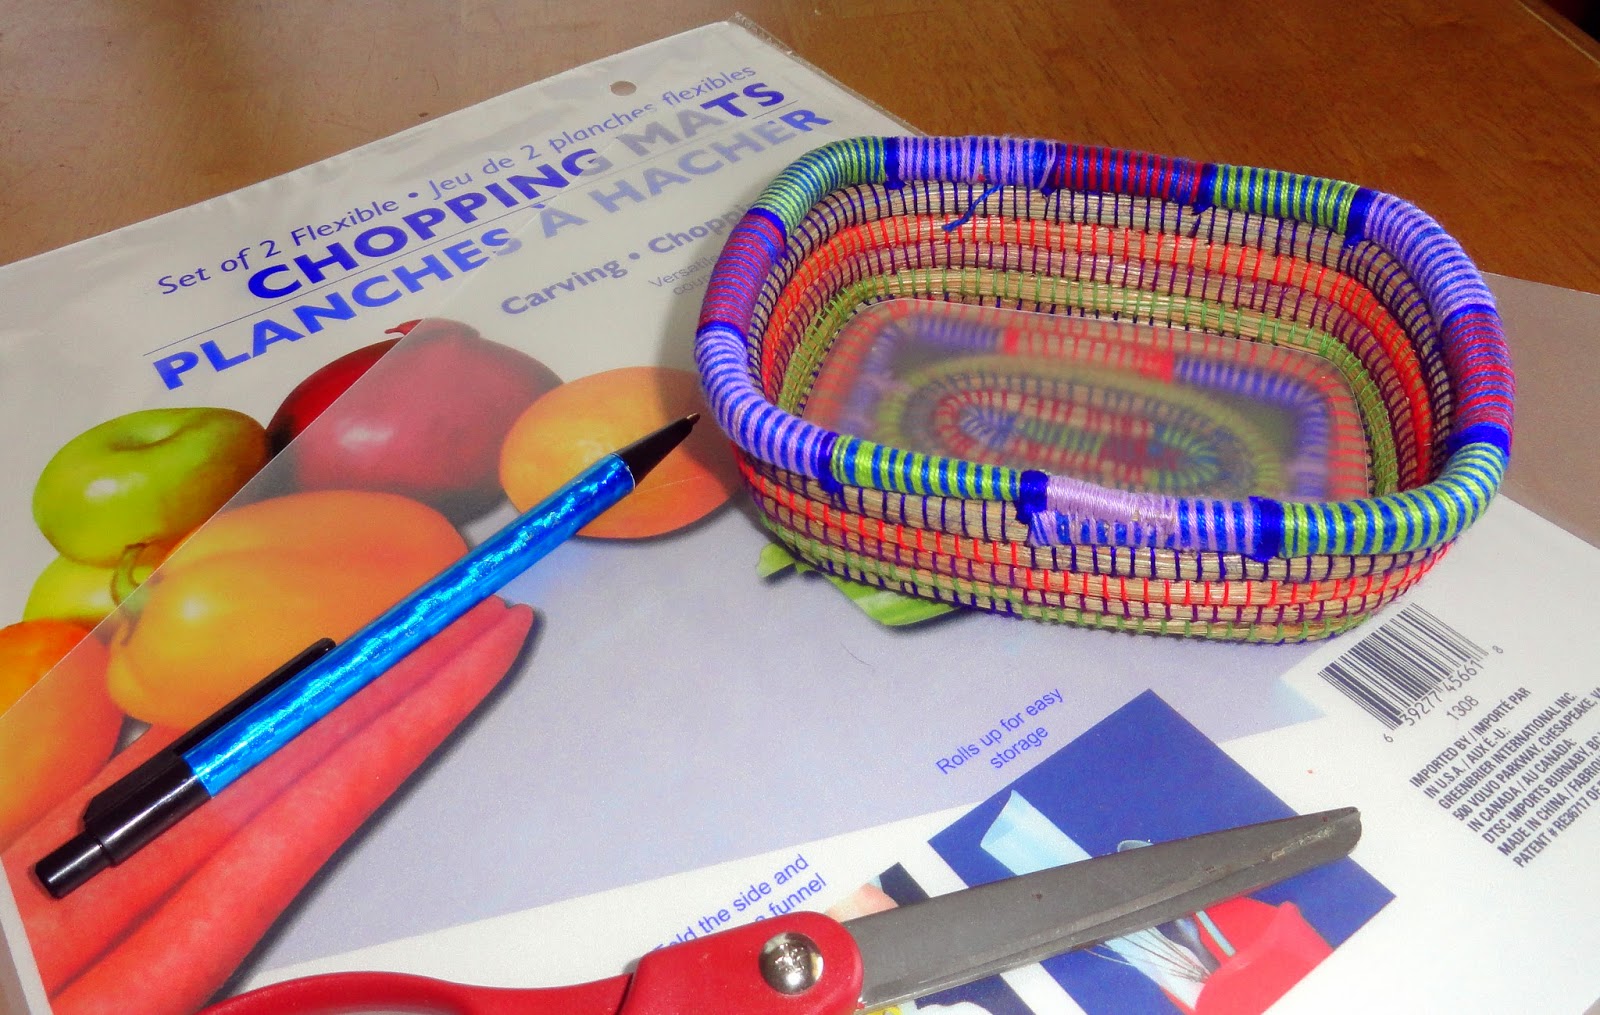
Last time I was browsing through the Greater Good end hunger site, this darling little basket made in Nicaragua called out to me. Do you ever have things that 'sing' to you, "buy me, buy me !"?  Well, this basket did. I can't imagine having the patience to wrap those coils and have such nice even spacing for the threading.  It is a fine piece of work. Very colorful and it 'sang', how could not BUY it??  I also ordered a coil bead bracelet from Africa, that I've been eying for while.....


The order came today.  I am delighted.  The basket is oval, about 4" x 6" and a couple inches deep. A great size and there are tons of things it could be use for.  BUT the bottom is not completely woven, so there are holes in each corner, limiting how useful this little beauty could be.  NEVER FEAR, I have a quick and easy solution.


 Cutting mats.  That's right, I took a piece of clear cutting mat that I bought at Dollar Tree, (2 per pack, a generous 11x14") traced around the bottom of the basket and cut it to fit.  I have plans to cut the rest of the mats to fit a wire shelf so none will go to waste.  Anyway, now this gem of basket is ready for useful prettiness. 


I'm going to use it for jewelry.  Often when I get home in the afternoon, I take off my jewelry:  necklace, earrings and rings, but know I'll need them again when I go out later, so I set them on the dresser.   Several times earrings and rings have been knocked off dresser requiring a game of hide and seek to retrieve them.  That's not going to be a problem anymore.  This basket will be the new temporary holding bin for jewelry pieces.


There could be many other uses for a basket this size. Think how darling it would be with a floral arrangement.  OR filled cookies as a gift.  OR it could be a candy dish.  It is also a great size for things like alcohol wipes.  If you're someone that needs regular injections why not have a pretty place to keep your med gear.  OR it could be a desk organizer for holding post-its, paper clips and pushpins. I'm sure there are dozens of other uses, that is just a few that popped into my head.


And here is my shameless plug for http://greatergood.com/.  where you can click once a day to support a number of great causes. I found my pretty basket and some fun folk art jewelry on the 'hunger' section. Take a look around and maybe snag a pretty something for yourself or as a gift for someone else.  While you're there sign up for an email reminder and make a daily habit of clicking for a cause or two. 


Saturday, March 1, 2014

Singing Time Kites Poster


Primary Singing Time here I come !!

I finished a kite poster for March Singing Times today. I'm not much of an artist but a few lines I can manage. I'm please with the result; it is bright and fun.  The kites are removable, each has a number on back.  The numbers indicate a song on my song list. I can the change the songs on the list each week for variety and as needed for song reviews. The children will select a kite and we'll sing the song indicated by the number on the back. 

My kites fly on bright blue poster board from Dollar Tree. (don't you love that place!)  The kites and knots are cut from scrapbooking paper, but construction paper, cardstock, or even white paper you decorate would work. Once I had the cutting done, I laid the kites and knots out on the poster board until I had an arrangement I liked.  I made pencil marks lightly at each corner of the kites to mark the placement.  I used a black sharpie and a straight edge to outline each kite.  I penciled in the string lines and then used the sharpie to draw over them.  Then I glued down the knot shapes.  If you don't want to glue, you could simply draw the knots.  The lines on the kites are lightly drawn with a regular ink pen to add some dimension.


 Finally, I put a piece of packing tape on the back of each kite and in the middle of the kite shape on the poster.That way the scotch tape I use to hold the kites on won't tear up the paper so they will be useable multiple times and I avoid laminating everything.


Below is a link for the kite shape and knots if anyone wants to make a kite poster too.
 

Kites PDF

Monday, February 3, 2014

Scratch Off Valentine's Day Riddles


Homemade scratch off Valentines with riddles! These were so much fun too make. Of course I had to make a couple samples to see if they really worked. Now I better get the finished cards in the mail to the Grandkids soon, or I'm going to scratch them all off myself. It's addicting !

Last month on Pinterest I noticed several ways to make DIY scratch off tickets. They didn't look too hard and seemed adaptable for fun, kid friendly, Valentine's greetings.  Since all the kids live too far away for coupons for cookie baking or even hugs, I needed something that would make their cards fun. Riddles seemed a good way to turn their Valentines a game.

First, I searched the web for cute riddles and line drawings to go with them. To find the pictures I searched for 'Valentine Elephant' and 'Valentine squirrels' for example.Adding the words 'coloring page' to the image search makes finding the drawings quicker.  Then I spent some time with the computer publishing program until I had a design I liked. I used 1/4 page postcard size for each design and printed 4 to a page on white cardstock.

Once the Valentines were printed, it was time to make them scratch games. This is mega simple.  You simply color over the area you want to be 'scratched off' with a WHITE crayon. Cover the area well, the wax protects the printing, and you can still read through the white. I put a line box around the riddle answer so I would have a defined outline to work in. 

Next you paint over crayon colored area with acrylic paint mixed with dish soap. I used a silver paint, but any color would work.  Mix 2 parts paint to 1 part dish washing liquid.  I used 1/4 teaspoon of paint and 1/8 teaspoon dish soap. It didn't take much to do the dozen valentines I made. Let the paint dry and you have a scratch off games.

That's it. Simple, fun and made with love. I hope the Grand-kiddlets enjoy them.